

Setting up an employee using the Employee Wizard is a simple 4-step process. From the Dashboard click Add Employee.

The first page relates to the employee’s Personal Details - fill out as many fields as possible, then decide on whether the employee will need access to Self-Service.
The second page relates to the employment details. Work your way down the page, selecting their Award, which Employment Agreement and employment type (Full Time/Part Time/Casual), and any other fields that may pop up. Greyed out fields will automatically fill in depending on the Award and employment agreement chosen.
Still on the second page, see below picture; ensure the correct start date is entered. If the employee needs a different pay rate to their Employment Agreement, you can click the ‘Override Pay Rate’ checkbox and change their rate and the hours worked each week as required.

Finally, on this page, pick which Leave Allowance Template will apply to this employee. This will depend on the state they’re employed in.

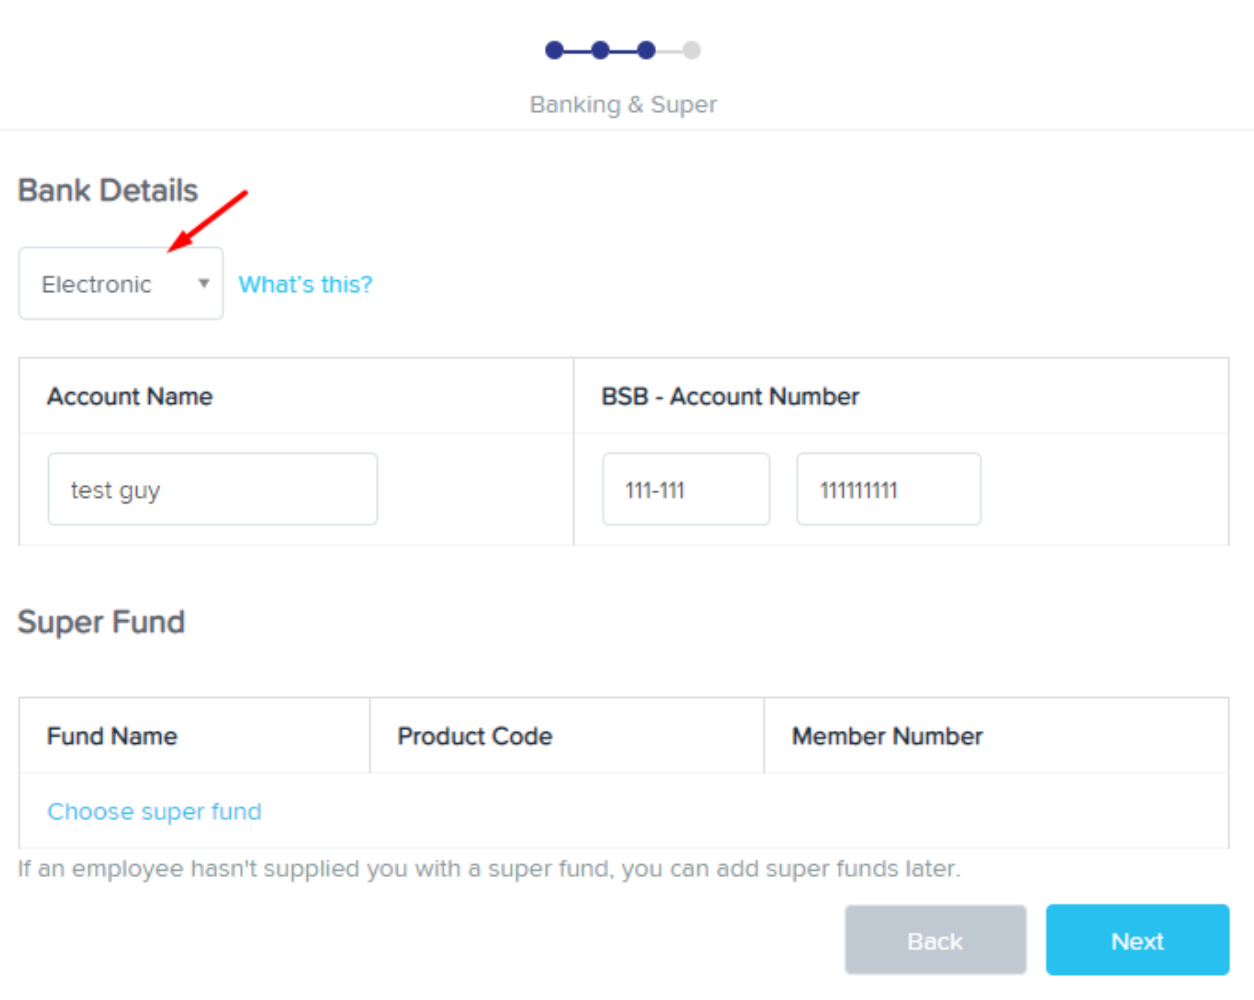
The third page is where you provide the bank account they’ll be paid into, and the Super Fund their super payments will get sent to. If using a payment method other than an electronic payment, click the drop-down pictured below and pick from the options, then fill in the account number as required.
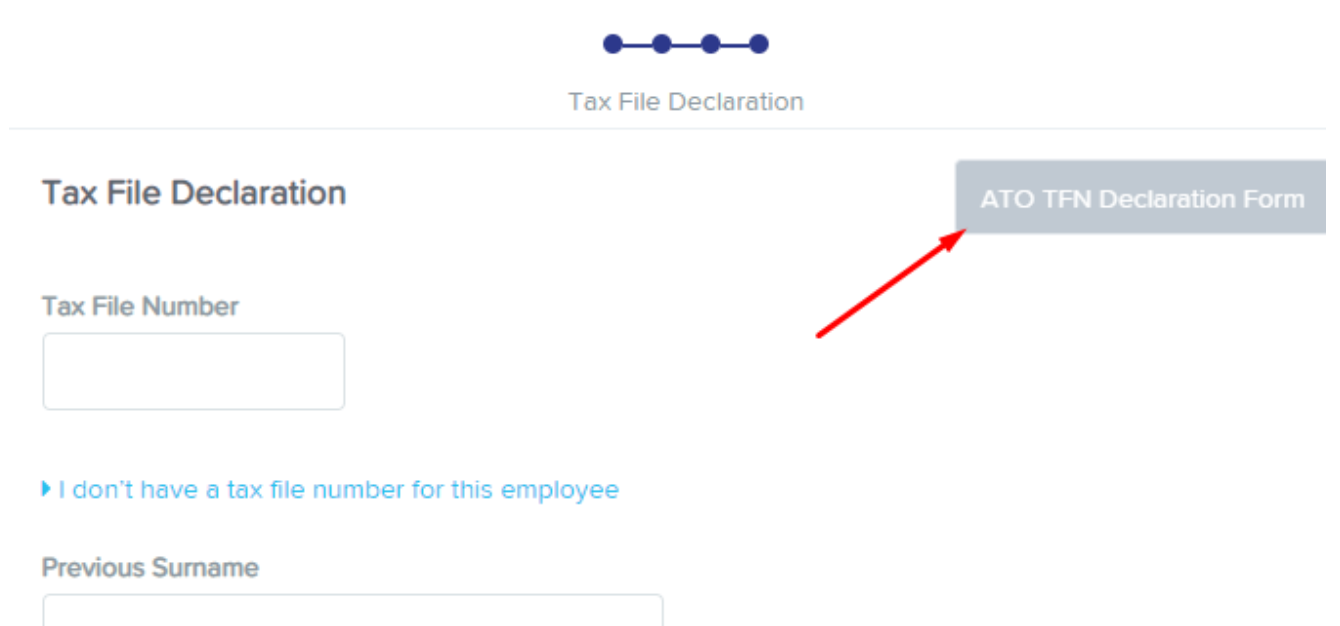
The final page is for the employee’s Tax File Declaration details. Fill the Tax File Number field and then the date their Tax File Declaration was signed. For more details on obtaining and filling this out, click the button pictured below.
You can notify the ATO that the Declaration has been filled through Ezipay by ticking the checkbox pictured below, then click Done, and the employee will have been added to the system.
